Entrance Power Guide to Talend ESB – Part 3
An Enterprise Service Bus (ESB) has become increasingly popular in many organizations as they seek an alternative to costly, brittle point-to-point integration solutions. Many organizations have to integrate numerous applications; an infrastructure based on a tangled web of hand-coded connections is difficult to maintain, brittle, and hard to fix if any one connection fails. An ESB presents an alternative to creating messy spaghetti code.
Follow along as we deploy our service, implement load balancing, and test our CRM integration in SoapUI.
In Part 1 in our Entrance Power Guide to Talend ESB series, we:
- Imported the WSDL into Talend Open Studio for ESB.
- Created and defined the service.
In Part 2 in our Entrance Power Guide to Talend ESB series, we:
- Enabled XML mapping of the CRM source data.
- Joined our CRM data sets via string manipulation in Talend Open Studio.
In this third and final installment in the Entrance Power Guide to Talend ESB series, we will walk you through the steps to deploy the service, then implement a load balancing with Apache Camel to provide more visibility to the endpoint so, finally, we can test a fully load-balanced, SOAP-based Web service provider to ensure our CRM integration is functioning properly.
Testing in SoapUI
The service is ready, now we can start it up and run tests in SoapUI, an open source Web service testing application. The screen below allows us to bring up dummy end points or services directly into studio for testing purposes.

Next, we open SoapUI, and start a “New SOAP Project” and bring up our WSDL so we can look at the customer operations in this testing environment.
We see our “getCustomer” operation under our Projects in SoapUI and click on “request” to look inside the operation, and our payload for the operation is displayed. It takes a single parameter, which is the “custId”.
Next, we go back to our customer CSV file that contains the original source information to which we are integrating and see our customer IDs are 10 digits.
Going back to SoapUI, we give a valid 10 digit customer ID to the service, and the service returns information about Fred Flintstone, catenating that name together and returning all of his details. To validate, we go back to the original CSV file and see that it is a match.

Then we go back to the Talend Open Studio window (below) to see the flow of information that occurred within the service when we tested it. We see we had one request, and there were five customers in the underlying customer resource. We matched on one, and we got a standard response. Now we have determined the service is ready to deploy.
Service Deployment
The first thing we want to do in the deployment process is export the service out of Talend Studio and into our runtime container.
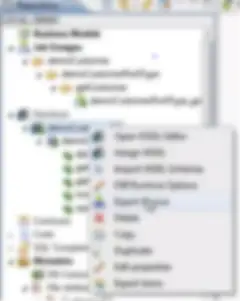
First, on the left-hand side of our Talend Open Studio for ESB screen, we find our “demoCustomer 0.1” and “Export Service.” A warning screen pops up “No Job Assigned” – it is telling us that we have some operations that have no assigned implementation, but that is fine, so we click “OK”.
In Part 1 we started up two runtime containers. Now we want to “Export Service” to the primary container we created:
We validate this export by going into the primary container and typing “list” and we see the new “demoCustomer 0.1” has started and is available. Success!
Since the port on which primary container deploys the services (8090) doesn’t match the port the Talend Studio is using (8040), we need to test to ensure the service is responding properly. We return to SoapUI and “Add new endpoint” and change the “localhost:” to 8040 and run the request through SOAP. The results show us the customer data we were hoping for, so we know the service response is running correctly.

Implementing the Load Balancing Integration Pattern
With our service response in place, the next step is to implement the load balancing algorithm and check out some of the mediation and routing capabilities available. To begin the load balancing process, we again “Export Service”, but this time we send it to the secondary runtime container, which we have not used. Now we have the load balancing framework: two functionally equivalent services running on two different containers.
After we export the service, we look inside the second container and see the “demoCustomer” deployed and running on default port 8041. As we did when we tested the service response above, we return to SoapUI and add another endpoint, this time changing the “localhost:” to 8041, and run the request on container #2 through SOAP.
We return to our interface that displays the container contents, and we see our customer service and know we are getting responses because the logging element we built into the service is logging the XML response directly through standard output. (At the bottom of the screenshot below)

Final Step: Routing and Mediation
We return to Talend Open Studio for ESB to look at the routing and mediation capabilities, and create a simple load balancing proxy to our customer endpoint. To start, we click “Mediation” in the upper right-hand corner, then “Resource”, and “Create New Resource”, and upload our familiar “DemoCustomer” WSDL.

Next, we “Create New Route” called “proxycustomer” and see the pallet on the right-hand side is no longer comprised of integration components; instead we see encapsulated capabilities of Apache Camel. We see things like “LoadBalancer”, “MessageRouter”, various processes and messaging endpoints – all Apache Camel features that enable us to build our routing and mediation capabilities.
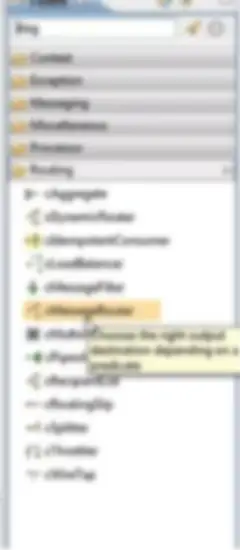
We start our routing implementation with the “cCxF” endpoint and then change the name to “proxyCustomer”. Next, we click the “Component” tab to apply some metadata to this component to specify how we are going to represent this new service endpoint as a route. We continue to give this route the same contractual interface as the other services in “DemoCustomer” – except this proxied endpoint is starting on port 8050.

Now we want to load balance this between the two customer services we have already deployed in the two containers. To configure this, we drag two more “cCxF” to the middle, and give each the same contractual interfaces, but apply the different container ports (8040, 8041) to the respective services.
Finally, we go to “Routing” on the left navigation and select “cLoadBalancer”, the standard Apache Camel load balancer that enables us to balance requests through the proxy interface to our two functionally equivalent endpoints. We select to load balance across our two containers using a standard “Round robin” algorithm.
Then we run this directly from Talend Studio so we can see how it is deployed. Effectively, we are starting a proxy interface to the demo customer service on point 8050. That route is now sitting there waiting for the request. We return to SoapUI and open another new endpoint on 8050.

To make sure load balancing is occurring between the two customer service endpoints, we check our primary and secondary containers to ensure that they are receiving the requests in turns. It looks like our primary container just got hit with load balancing, and the secondary container got hit to provide more response to the service. We can see that load balancing is happening!

We have now effectively created, exposed, and integrated our services into existing resources and generated simple load balancing patterns on top using our routing mediation framework.
Using Talend Open Studio for ESB, you can try this yourself. Utilize Talend’s free ESB and see how easy it is to implement the same pattern we just demonstrated inside your own network. Try it today.